Have you ever sat in a car on a scorching summer day, wishing for some relief from the sun’s harsh glare? Or maybe you dream of giving your ride a sleek, custom look without emptying your wallet? Getting your car windows tinted can do both! But, getting it done professionally can be super expensive.
That’s where DIY car tinting comes in! It’s a great way to save money and take control of your car’s appearance. However, choosing the right tint, applying it smoothly, and avoiding bubbles and mistakes can seem tricky. There are many types of tints, tools, and techniques out there, which can feel overwhelming. You might be wondering if you can handle it yourself.
This blog post is your friendly guide to DIY car tinting! We’ll break down everything you need to know, from picking the best tint for your needs to the step-by-step application process. You’ll learn how to avoid common problems and get professional-looking results. By the end, you’ll be ready to transform your car and enjoy a cooler, more stylish ride. Let’s get started!
Our Top 5 Diy Car Tint Recommendations at a Glance
Top 5 Diy Car Tint Detailed Reviews
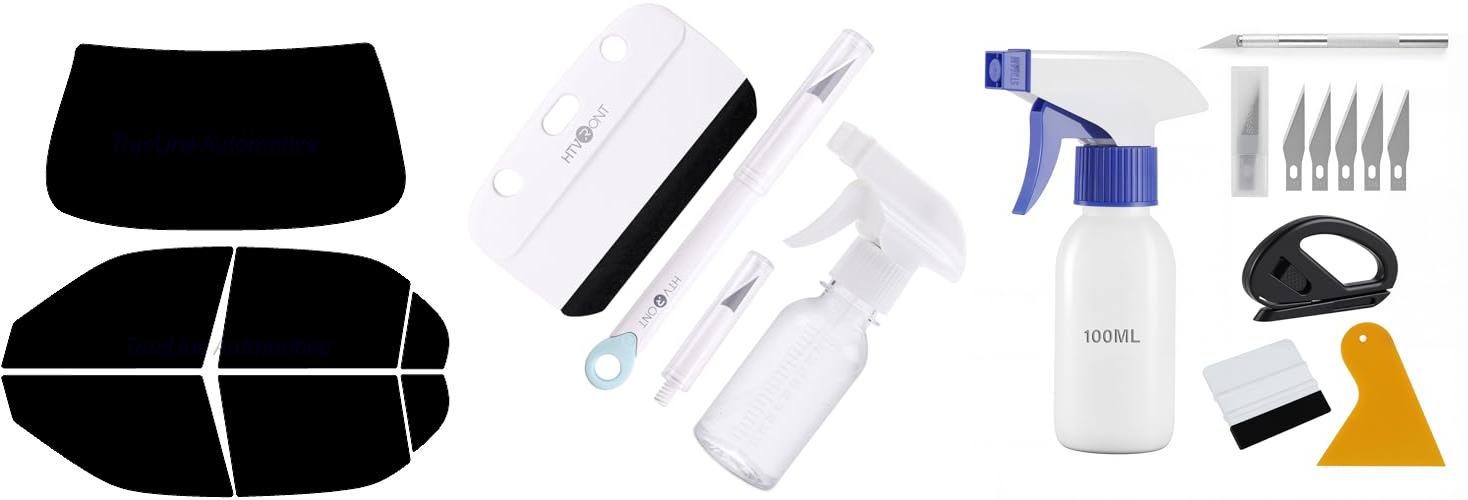
1. TRUE LINE Automotive DIY Car Window Tinting Kit – Customize Shade: 5%

Rating: 9.2/10
The TRUE LINE Automotive DIY Car Window Tinting Kit is for car owners. It lets you tint your side and back windows. The kit comes with precut tint for your car. You can pick the shade you want. It blocks 99% of UV rays. You don’t have to cut any extra film. It’s easy to install with the release taps.
What We Like:
- You can pick the tint shade you want: 5%, 20%, 35%, or 50%.
- The tint is pre-cut for your car windows.
- You don’t have to cut the tint yourself.
- The kit blocks 99% of harmful UV rays.
- You can mix and match shades.
- You can pick the type of tint, like carbon or ceramic.
- The kit comes with release taps to help you install it.
What Could Be Improved:
- You need to prepare your windows before you start.
- This kit is only for side and back windows.
This DIY kit is a great way to tint your car windows. You can customize the look of your car. It’s a good choice for people who want to do it themselves.
2. HTVRONT Window Film Kit – 4 Pcs Window Privacy Film Installation Tools

Rating: 9.0/10
The HTVRONT Window Film Kit has everything you need to install window film. It comes with a felt squeegee, a detachable knife, a spare blade, and a spray bottle. This kit makes applying window film easy. It’s great for cars, glass, and more!
What We Like:
- The kit has all the tools you need.
- The felt squeegee won’t scratch your film.
- The spray bottle is easy to use.
- The knife is safe with a cover.
- The knife is useful for many projects.
What Could Be Improved:
- The knife is sharp.
This HTVRONT window film kit is a great choice for anyone wanting to install window film. It’s easy to use and has all the essential tools. You can get professional results at home!
3. SINGARO Car Window Film Kit

Rating: 9.1/10
The SINGARO Car Window Film Kit is a handy set for anyone wanting to tint their car windows or work with vinyl film. It includes five essential tools, like squeegees, a spray bottle, and a cutter. This kit gives you everything you need to apply film smoothly and safely. It’s designed for both beginners and experienced users. You can use it for car windows, but also for other projects like wallpapering.
What We Like:
- The kit has all the basic tools needed for tinting.
- The spray bottle has different settings to help with the film application.
- The tools are made of strong materials like ABS plastic and carbon steel.
- It can be used for more than just car windows.
- The kit is small and easy to carry around.
What Could Be Improved:
- It’s important to keep the kit away from young children.
This SINGARO kit is a good option for anyone who wants to tint their car windows at home. The included tools make the job easier and safer. You can use the kit for different projects too.
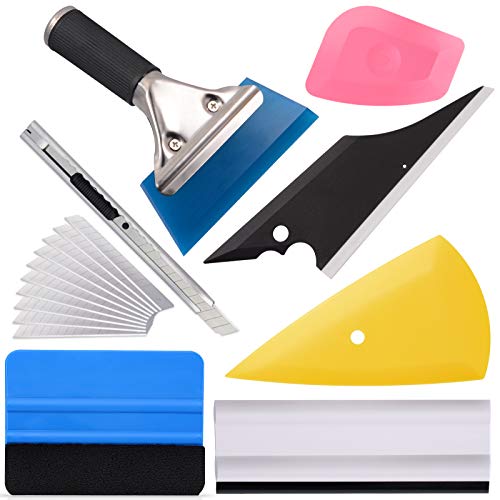
4. EHDIS Vinyl Wrap Tool Window Tint Kit 7 Pieces Vehicle Tinting Tools Car Glass Protective Film Wrapping Installation Set Included Vinyl Scraper
Rating: 9.2/10
The EHDIS Vinyl Wrap Tool Window Tint Kit is a 7-piece set designed for applying window tint, vinyl wraps, and protective films. This kit includes a variety of squeegees, a cutting knife, and other tools to help you install these materials smoothly and efficiently. It’s made for both beginners and experienced users. This kit helps you get professional-looking results at home.
What We Like:
- The kit has multiple squeegees for different jobs. The blue rubber squeegee works well on large areas. The felt squeegee protects the film from scratches.
- The included cutting knife is safe and easy to use. It can cut vinyl and other materials.
- The tools are useful for many projects. You can use them on car windows, walls, and more.
- The kit is portable and easy to store.
What Could Be Improved:
- Some users might need more detailed instructions.
- The quality of some tools could be better.
This EHDIS kit is a good choice for anyone who wants to apply window tint or vinyl wraps. It offers a variety of tools at a reasonable price.
5. Gila Static Cling 5% VLT Automotive Window Tint DIY Easy Install Glare Control Privacy 2ft x 6.5ft (24in x 78in)

Rating: 9.4/10
Want to darken your car windows without a professional? The Gila Static Cling 5% VLT Automotive Window Tint is for you! This DIY tint is easy to install. It gives your car a sleek look. You can block a lot of light and get more privacy. This product is a good choice for anyone wanting to upgrade their car’s appearance and comfort.
What We Like:
- Darkens your windows! It blocks 95% of light.
- It is removable and reusable. You can take it off when you want.
- You will see better. The tint reduces glare.
- It is scratch-resistant. The tint will last.
- Easy to install. You don’t need a pro.
What Could Be Improved:
- Installation might be tricky for some.
- The tint is very dark, which may affect visibility at night.
This Gila window tint is a great way to add privacy and style. It is easy to install and remove. You can try it out and see if you like it!
DIY Car Tint: Your Guide to Shady Success
Are you thinking about tinting your car windows? It’s a cool way to make your car look better and stay cooler inside. Doing it yourself can save you money. This guide will help you make a smart choice when buying DIY car tint.
Key Features to Look For
When you buy DIY car tint, there are important things to consider.
- VLT (Visible Light Transmission): This tells you how much light comes through the tint. Darker tints have lower VLT numbers. Check your local laws. Some states don’t allow very dark tints on the front windows.
- UV Protection: Good tint blocks harmful UV rays. This protects you and your car’s interior from sun damage.
- Scratch Resistance: Look for tint that resists scratches. This will help it last longer and look good.
- Adhesive Quality: The adhesive is what makes the tint stick to the glass. Strong adhesive is important for a good, long-lasting job.
- Ease of Application: Some tints are easier to apply than others. Look for kits that come with tools and instructions.
Important Materials You’ll Need
You’ll need more than just the tint film. Here’s what to have:
- Tint Film: This is the main thing! Choose the right VLT and size for your car.
- Application Solution: This is usually a mix of water and a little soap. It helps you move the tint around.
- Squeegee: Use this to smooth out bubbles and remove the solution.
- Utility Knife or Razor Blade: You’ll use this to trim the tint to fit your windows. Be careful!
- Spray Bottle: To spray the application solution.
- Lint-Free Cloths: To clean the windows and wipe up spills.
- Heat Gun or Hair Dryer: You might need this to shrink the tint around curved windows.
- Gloves: To keep your hands clean.
Factors That Improve or Reduce Quality
Some things make the tint job better, and some things make it worse.
- Good Quality Tint: Higher quality tint is easier to work with. It lasts longer and looks better.
- Clean Windows: Make sure your windows are spotless before you start. Any dirt or dust will show up under the tint.
- Careful Application: Take your time! Rushing can lead to bubbles, wrinkles, and a bad look.
- Proper Tools: Using the right tools makes a big difference.
- Temperature: The temperature can affect the tint. It’s best to work in a clean, dust-free area.
User Experience and Use Cases
DIY car tint can be a fun project. Many people use it to:
- Improve Looks: Tinted windows look cool and stylish.
- Reduce Glare: Tint helps block the sun’s glare, making driving safer.
- Protect the Interior: Tint protects your car’s interior from fading and cracking.
- Increase Privacy: Tint makes it harder for people to see inside your car.
- Save Money: DIY tinting is cheaper than paying a professional.
Frequently Asked Questions about DIY Car Tint
Q: Is it hard to apply car tint?
A: It can be tricky, but it’s possible with patience and practice. Follow the instructions carefully.
Q: How much tint should I buy?
A: Measure your car windows carefully. It’s always better to have a little extra.
Q: What’s the best VLT for my car?
A: Check your local laws. Consider what you want to see, and how much privacy you want.
Q: How do I clean the windows before tinting?
A: Use a glass cleaner and a lint-free cloth. Make sure there is no dust or dirt.
Q: What do I do if I get bubbles?
A: Try to smooth them out with a squeegee. Sometimes you can use a heat gun to help remove them.
Q: How long does car tint last?
A: Good quality tint can last for years if applied correctly.
Q: Can I tint my front windshield?
A: Some states don’t allow it, or have strict rules. Check your local laws.
Q: What is the best way to cut the tint?
A: Use a sharp utility knife or razor blade. Be careful not to scratch the glass.
Q: Can I remove the tint if I mess up?
A: Yes, you can remove it with a razor blade and application solution. It takes some work.
Q: Where can I buy DIY car tint?
A: You can find it at auto parts stores, online retailers, and some hardware stores.
In conclusion, every product has unique features and benefits. We hope this review helps you decide if it meets your needs. An informed choice ensures the best experience.
If you have any questions or feedback, please share them in the comments. Your input helps everyone. Thank you for reading.

Hey there, My name is Joe Martin & I’m the author of OffroadersGuild.com. I’ve been hitting the dirt for a while now. I’ve been off-roading in all sorts of vehicles, from Jeeps to trucks and everything in between.
I’ve also built and modified a few off-road vehicles of my own, so I know what works and what doesn’t when it comes to upgrading and modifying off-road vehicles. I started this website to share my experience and help others get the most out of their off-roading adventures. Let’s hit the trails!